Acrylic display manufacturing
One display. Several different jobs.
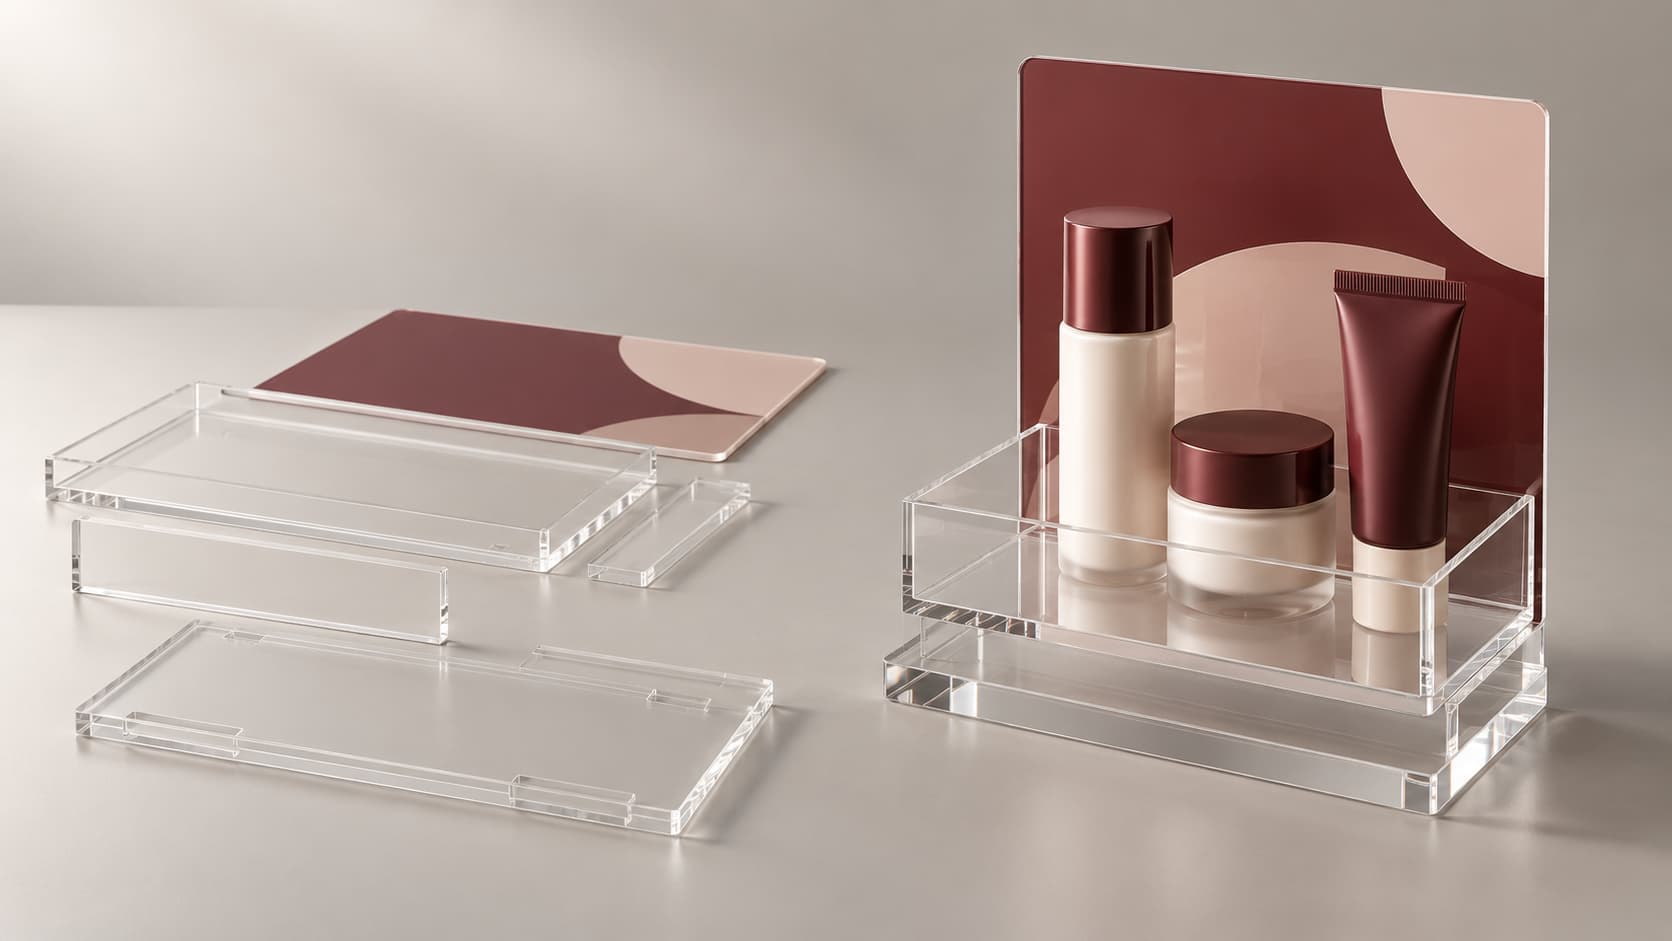
Acrylic display stands can look simple because their parts work together. Consider a countertop cosmetics display: a clear tray holds the products, a printed back panel carries the branding, and a base supports both. Making it involves several different jobs.
- Printed back panelBranding
- Clear trayProduct access
- BaseSupport
Quick answer: Acrylic display stands for POS use are typically fabricated from PMMA sheets. The sheets are cut into parts, finished, printed, bent where needed, and joined into the final structure. Inspection and protective packaging complete the job. Some designs skip certain operations, and printing, forming, and assembly must be arranged around the parts involved.
Understanding acrylic display manufacturing means following those parts from the original drawing to the store counter.
01Choose Materials Around the Display Design
Start with the product being displayed: its dimensions, weight, position, and how shoppers will pick it up. These details determine the tray layout, support positions, and available space for graphics.
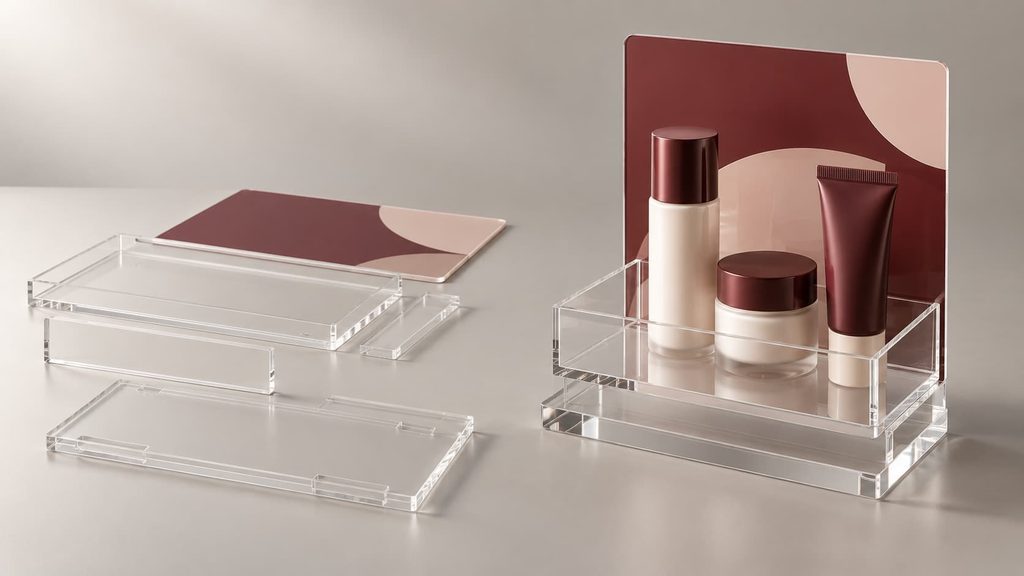
Our example tray needs visibility; its back panel needs readable branding. Clear acrylic suits the first role, while opaque acrylic or printed clear sheet could serve the second. Different parts do not necessarily need the same material or thickness.
Cast and extruded acrylic are both used in fabrication. Confirm the grade against the planned cutting, printing, forming, and bonding operations. For a closer look at material selection, see our clear acrylic sheets for display manufacturing guide.
Thickness also needs context. A wide tray supported only at its ends behaves differently from one supported underneath. For slotted parts, the actual sheet thickness must match the intended fit.
02Cut the Parts and Prepare Their Edges
The design becomes individual bases, trays, dividers, and back panels. Cutting equipment is chosen around the features each part needs.
Scroll sideways to see all columns.
| Part requirement | Process to consider | What needs attention |
|---|---|---|
| Detailed flat outlines and cutouts | Laser cutting | Edge appearance, cut width, and later bonding or forming |
| Pockets, steps, grooves, and machined fittings | CNC routing | Tool access, internal corner radii, and critical dimensions |
| Straight rectangular blanks | Saw cutting | Accurate sizing and any required edge finishing |
Laser cutting can produce glossy acrylic edges under suitable conditions, reducing additional finishing. Results depend on the material and machine setup. Trotec’s acrylic cutting guidance explains these variables.[3]
Exposed edges may receive diamond polishing, flame polishing, or other finishing. Bonding edges need separate instructions: polishing that rounds a mating edge reduces its contact area. Plaskolite’s guidance calls for clean, matching flat surfaces for cemented joints.[1]
The next operation matters as much as the finished edge. Mark which edges remain visible and which become part of a joint.
Define the finish for the edge shoppers will see.
Keep mating surfaces clean, flat, and matching.
03Print the Graphics on the Right Surface
The back panel introduces another set of decisions: the printing method, viewing side, and areas that should remain transparent.
Digital UV flatbed printing deposits ink directly onto the panel and cures it with ultraviolet light. It suits full-color graphics and artwork variations. Screen printing transfers ink through a prepared mesh stencil and is worth comparing for repeated spot-color designs. Artwork, setup costs, ink requirements, and quantity determine the practical choice.
The terms describe different things: screen printing is a transfer method, while UV describes curing. Screen-printing inks can also be UV-cured.
Front Printing, Reverse Printing, and White Ink
With front printing, the graphic sits on the viewing surface. With reverse printing, it sits behind clear acrylic and is viewed through the sheet. The artwork is mirrored for that viewing direction.
White ink provides backing where colors need opacity. For a typical reverse-printed graphic, the color layer goes against the acrylic, followed by white behind it. Transparent windows remain unprinted where the design requires them. Mimaki demonstrates the corresponding front- and back-printing arrangements in its acrylic printing example.[2]
Scroll sideways to see the full diagram.
Decide When to Print
An assembled display may prevent a flatbed printer from reaching the intended surface. Printing first solves access problems, but a graphic crossing a bend needs an ink system compatible with forming and allowance for distortion. Bonding areas also need an agreed surface condition.
Send the structural drawing alongside the artwork for custom acrylic printing, marking the viewing side and transparent areas.
04Bend or Form the Parts That Need Shape
A flat strip can become an angled support or a tray with a raised lip through line bending: a narrow zone is heated, bent, and held in position while it cools. More complex curves require a suitable forming method and tooling.
For the cosmetics tray, the raised lip must retain the bottles without hiding their labels. Its final position matters alongside the bend angle. Nearby graphics, holes, and joints also influence the design.
For process details and defect diagnosis, see how to bend acrylic sheets.
05Assemble for Everyday Use
The tray, base, and back panel now need to work as one structure.
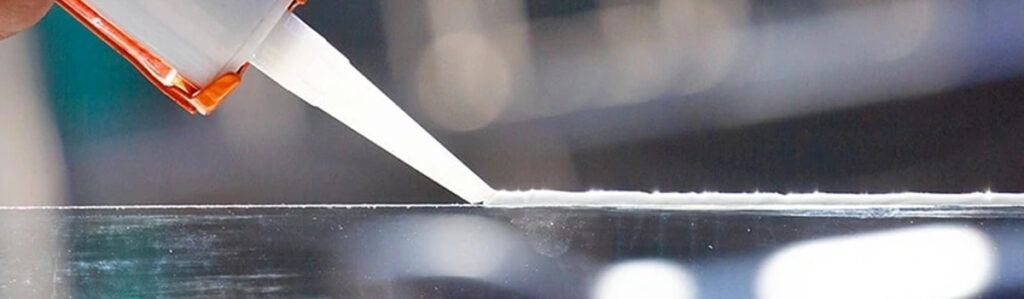
Bonding suits permanent connections where unobtrusive joints matter. Compatible acrylic cement or adhesive joins prepared surfaces, with alignment controlled during setting and curing. Joint quality depends on preparation, adhesive selection, and processing stress. For acrylic display stands that require bonded trays, bases, or other assembled components, Grandview offers custom acrylic bonding and splicing services. Share your drawings, material thicknesses, and requirements for visible joints so our team can review a suitable joining approach for your design.For general guidance on surface preparation, adhesive selection, and processing stress, see Plaskolite’s bonding guidance.[1]
Mechanical fasteners allow access or replacement where the design requires it. Hole geometry, hardware, and tightening must avoid excessive local pressure on the acrylic.
Slot-fit assembly offers a route to removable parts or flat-pack construction. It requires a confirmed relationship between sheet thickness, slot dimensions, and the intended fit.
For our example, a removable back panel makes seasonal branding easier to change. The tray still needs enough access for staff to refill it. These everyday actions belong in the design review.
06Approve the Complete Display and Its Packaging
A sheet sample confirms only part of the result. Inspect the assembled prototype with the intended products in place.
Scroll sideways to see all columns.
| Check | What to confirm |
|---|---|
| Product fit | Items fit, labels remain visible, and products can be removed and restocked |
| Graphics | Correct viewing direction, position, white backing, and appearance under agreed lighting |
| Assembly | Parts align, joints meet agreed appearance requirements, and removable components operate properly |
| Delivery | Surfaces, projecting parts, and joints are protected; kits include the required hardware and instructions |
Record the approved drawing and artwork versions with the sample. Misaligned graphics, tight slots, visible adhesive marks, and awkward restocking are easier to address before production.
Choose the delivery form
- Fabricated parts
- If your team will complete printing and assembly, choose fabricated parts.
- Assembled displays
- If stores need ready-to-place units, choose assembled displays after reviewing the packaging.
- Flat-pack kits
- Flat-pack kits offer another option, with packing volume balanced against assembly work at the destination.
FAQs About Making Acrylic Display Stands
Can acrylic displays be made without a mold?
Many designs use cut, bent, and bonded sheet without an injection mold. Bending fixtures, assembly jigs, or forming tools may still be needed.
Can I request a quote with only a reference image?
An image can start the discussion. Add approximate dimensions, product information, and quantity. Dimensions and construction details must be confirmed before production.
What changes the cost of an acrylic display?
Material, sheet usage, machining time, bends, joints, printing setup, finishing, quantity, and packaging all contribute. Compare quotations for the same construction and delivery form.
What should be checked before a repeat order?
Confirm the current drawing, artwork, material, hardware, and packaging against the approved sample. A change in the product being displayed also warrants a fit review.
Start with a Clear Display Brief
A useful brief for acrylic display stands connects the shape of the display, the position of its graphics, and how it will be assembled and used.
For custom acrylic retail displays, send Grandview Acrylic your drawing or reference image, dimensions, artwork, quantity, preferred delivery form, and destination. Include the product dimensions and weight where the display will carry merchandise.
Submit your display requirements for project review.
References and Further Reading
- OPTIX-L Continuous Cast Acrylic Sheet Fabrication Guide
Plaskolite. Supports surface preparation, cementing, forming, and joint-quality considerations. View source: OPTIX-L guide (PDF). - Welcoming Board: Acrylic Printing Application
Mimaki. Illustrates front and reverse printing with color and white ink. View source: acrylic printing example. - Laser Cutting Acrylic: Flame Polished Edges
Trotec. Explains how material and machine conditions affect laser-cut acrylic edges. View source: laser-cutting guidance.