Fastening acrylic · Material behavior
Yes, you can screw into acrylic, and acrylic panels are bolted, screwed and threaded every day. What does not work is treating it like wood.
In wood, a hole drilled snug to the screw, a screw driven until it feels solid, and a thread expected to hold the load are all reasonable habits. In acrylic, each of those habits is a common reason for the crack that spreads out from the hole.
Acrylic does not fail at the screw. It fails at the habit.
There is more to the answer than workshop technique. The same few properties that make acrylic clear, stiff, and precise to machine also explain why it handles a screw so differently. Once you see why the hole cracks, it becomes easier to see what acrylic is good at, and where a design has to make room for it.
Why Acrylic Reacts Differently to a Screw
Drive a screw into a piece of wood and the fibres around it compress. That small amount of give spreads the force of the screw, so a slightly undersized hole or an extra half-turn usually goes unnoticed.
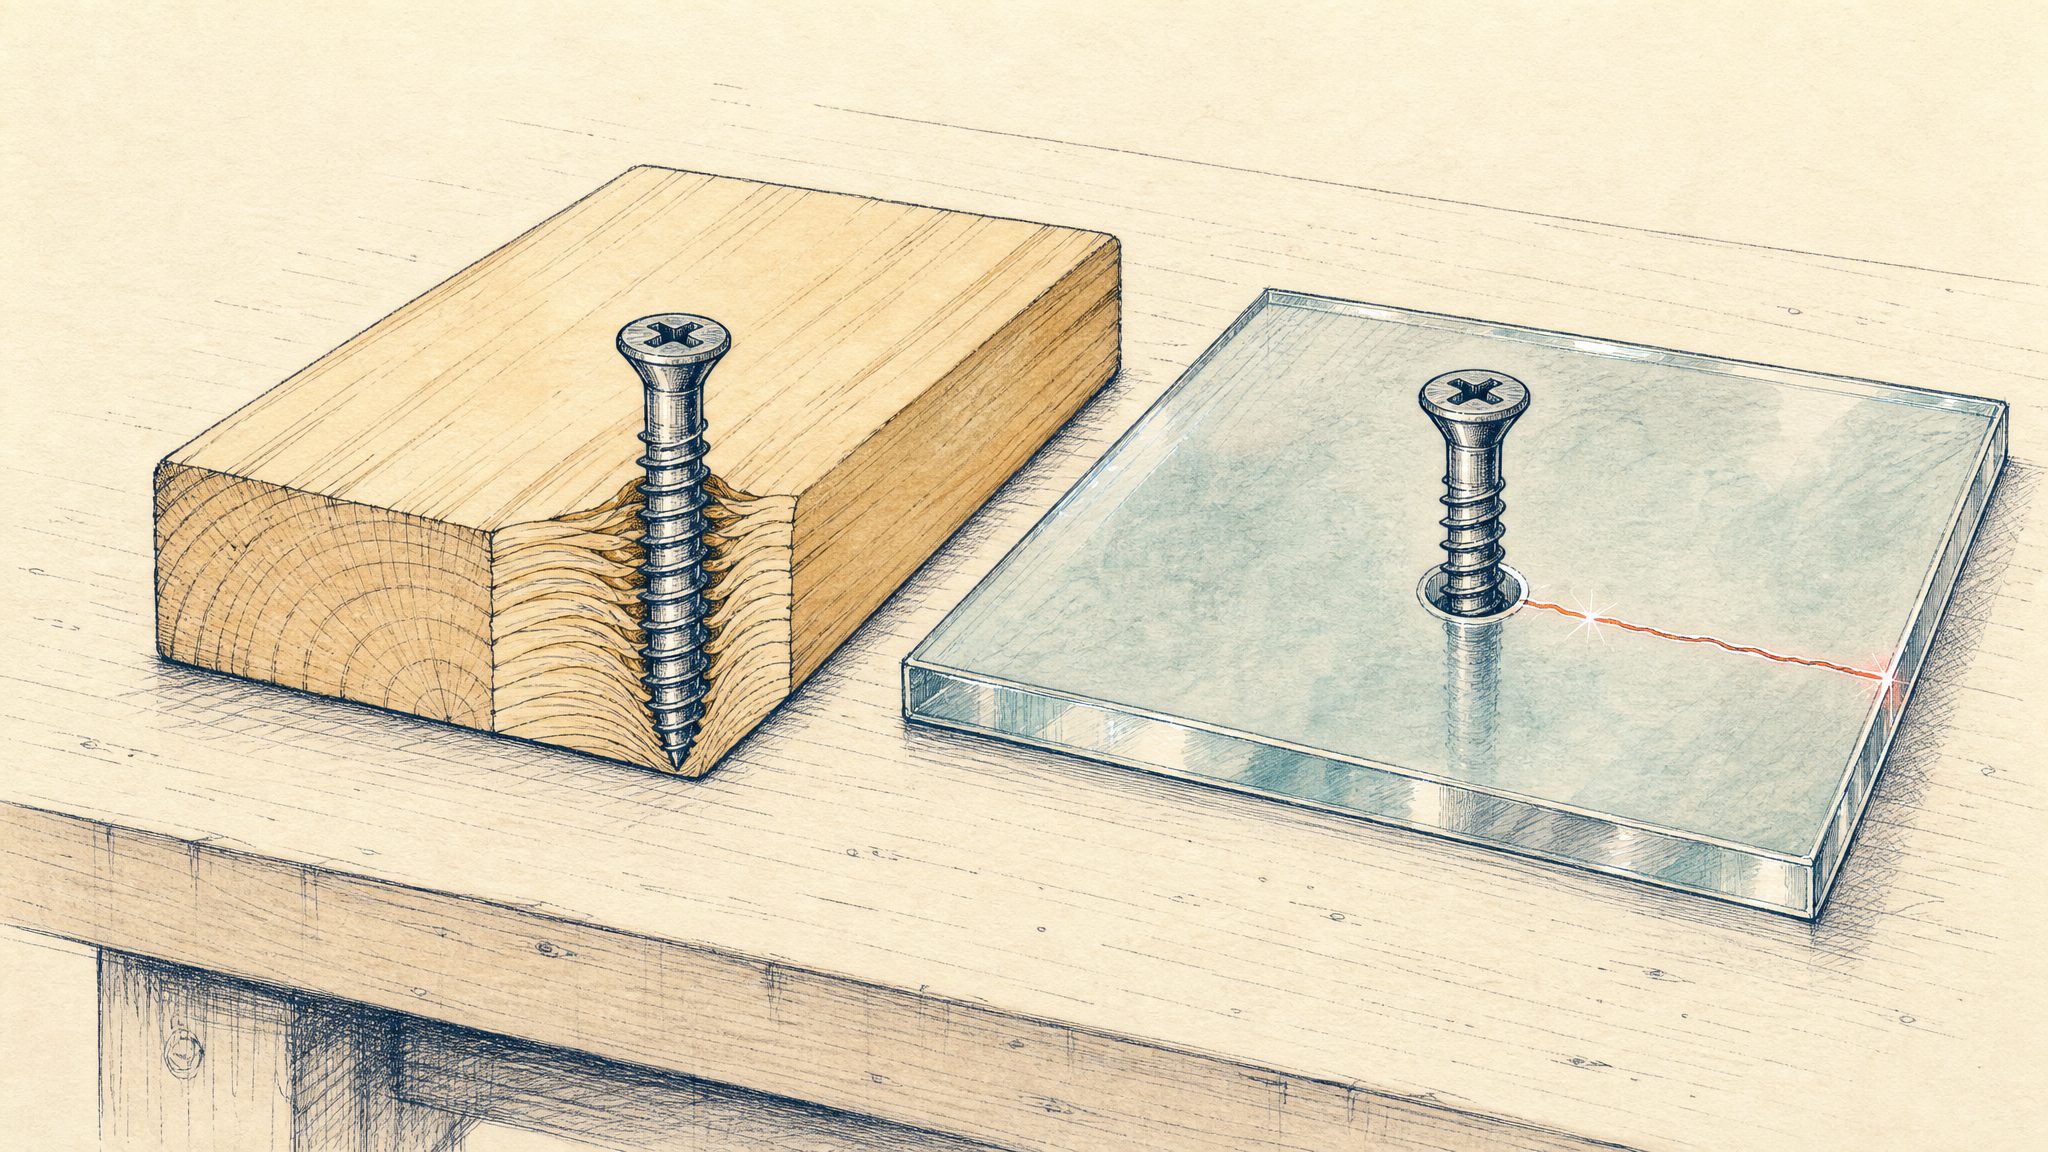
Acrylic is a stiff, glassy plastic. Around a hole it has far less room to give, so the force from a tight screw, a forced thread, or a panel that wants to move stays concentrated at the edge of the hole. Two other properties then decide what happens next.
The first is notch sensitivity. A notch is any sharp interruption in the material: a chip at the hole exit, a rough drilled wall, a sharp-cornered thread. In a notch-sensitive material, stress gathers at that point, and a tiny crack starting there can grow. Perspex’s technical manual puts it plainly: minute cracks that start at a hole can propagate a long way across the sheet.[3] This is why a crack often runs straight from a screw hole towards the edge of the panel.
The second is how acrylic handles heat. It has relatively low thermal conductivity and a high coefficient of thermal expansion, so heat from drilling stays near the cut and makes the material expand.[1] That is why a drill that runs hot can melt or gum the hole rather than cut it cleanly. In service, the same expansion makes a fastened panel grow and shrink as the temperature changes, and a fixing that leaves it no room turns that movement into stress at the hole.
These properties do not make acrylic a weak material. They make it an unforgiving one. It rewards a hole that was designed and penalises one that was improvised.
Three Habits That Crack Acrylic Around Screws
Habit 1 Drilling the hole to the size of the screw
A hole that grips the screw is a good hole in timber. In acrylic, it leaves no clearance, so any movement of the panel presses the screw against the hole wall.
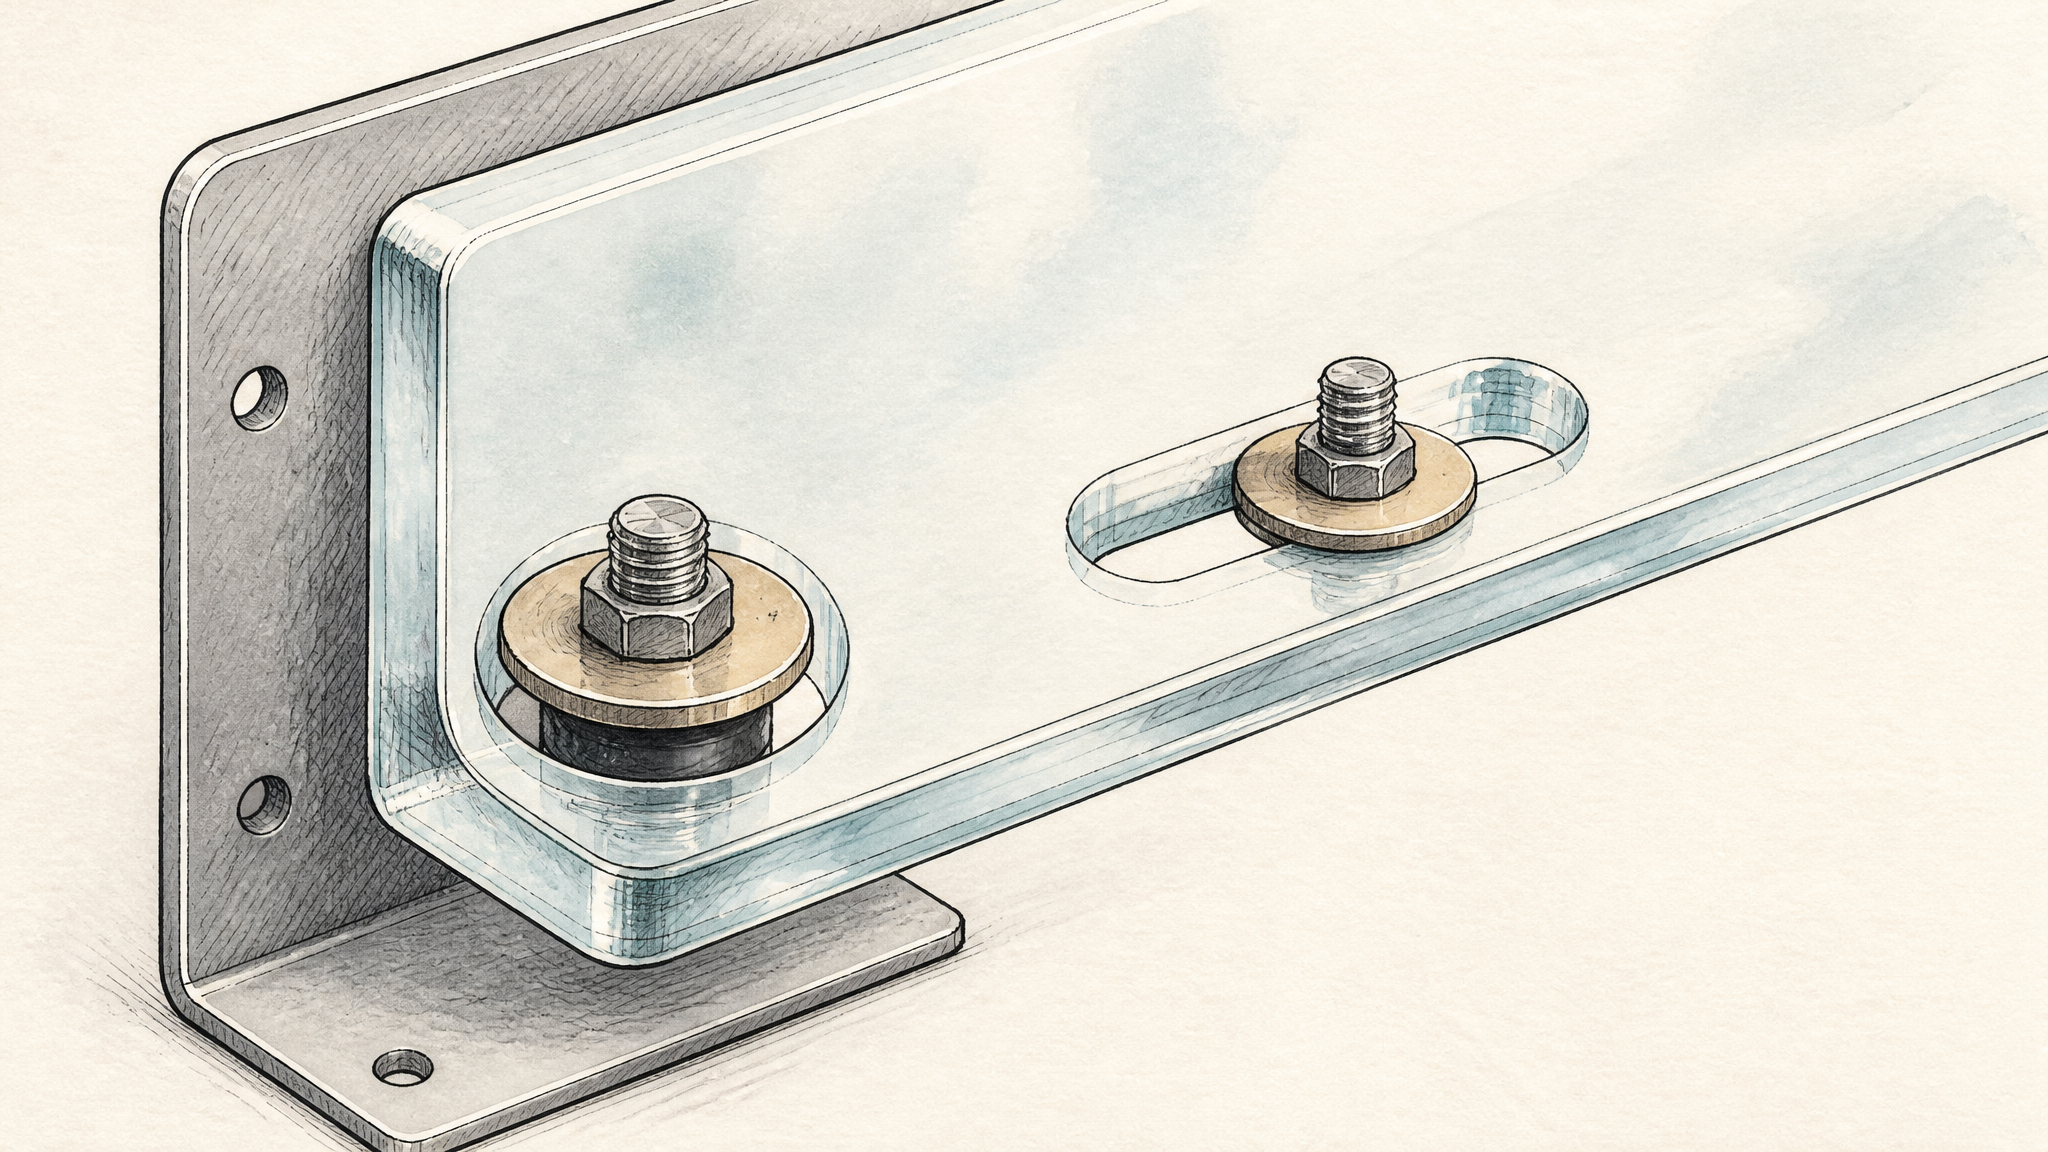
For panels supported by point fasteners, ACRYLITE’s drilling guidance gives two rules: the hole diameter should be at least twice the bolt diameter, to leave clearance for thermal and moisture expansion, and the distance from the hole centre to the sheet edge should be at least 1.5 times the drilled hole diameter.[1]
Scroll the diagram sideways on a small screen.
On long panels, the direction of movement matters as well. Perspex recommends that holes for screws or bolts be oversize and elongated, so the sheet can slide as it expands instead of pushing against the fastener.[3]
The finish of the hole is part of its size. A chipped exit or a rough wall is exactly the kind of notch the material is sensitive to. ACRYLITE recommends deburring holes that will see forces from screws or bolts, and Perspex advises radiusing and polishing the edges of bolt holes. How the hole is cut affects that edge from the start: tooling for acrylic is set up to scrape the material rather than bite into it.
Habit 2 Tightening until it feels solid
On wood or metal, “tight” is a reasonable target. On acrylic, a screw head pressing on a small area is a concentrated load on a notch-sensitive material. Tightening it again later, after the panel has already been stressed by a temperature change, adds to that.
The aim is to spread the load and stop short of clamping the sheet. Perspex calls for a load-spreading bar or washers wherever acrylic is fixed with screws or bolts, and specifies neoprene washers in bolt holes for some fixed installations. A flexible grommet in an oversize hole serves the same purpose: it lets the bolt locate the panel without the metal bearing directly on the acrylic.
The same manual is direct about one fastener: do not use countersunk screws.[3] A countersunk head is a cone. As it tightens, it pushes outward against the angled wall of the hole like a wedge, which is the wrong kind of force for this material. This is different from using a countersink tool to deburr the edge of a hole, which removes a notch rather than creating a wedge.
Habit 3 Asking the thread to carry the load
Acrylic can be tapped. Normal taps and dies cut threads in it, and the material machines precisely enough that the result can look perfectly clean. ACRYLITE’s machining guidance adds three conditions: avoid sharp-edged threads because of notch sensitivity, do not design the thread to bear loads, and reinforce the internal thread with a metal insert if the connection will be unscrewed often.[2]
The rule
If a hole carries load or will be opened often, give it metal: a threaded insert, or a through-bolt with washers. If it only locates the panel, give it clearance.
Most fastening decisions on an acrylic part fall into one of these situations:
| What the hole has to do | A sound approach | What to avoid |
|---|---|---|
| Locate a panel that hangs or sits in place | Oversize clearance hole, washer or grommet, snug rather than tight | A hole sized to the screw |
| Hold a cover that is removed for service | Metal threaded insert, or a through-bolt that carries the clamping force | Repeatedly screwing into a thread cut in the acrylic |
| Fix a long panel exposed to temperature change | Elongated, oversize holes that let the sheet move | Fixing both ends tightly |
| Carry a structural or impact load | Let the load bear on a frame or support, with fasteners only locating the sheet | Making the bolts the main support |
Scroll the table sideways on a small screen.
The last row also comes from the Perspex manual, which advises against using edge bolt-fixing as the primary support without load-spreading devices.
Why Some Cracks Appear Days Later
Not every crack shows up while the screwdriver is still in your hand. A panel can be installed cleanly and then develop a crack or a pattern of fine lines around the holes days or weeks later. Those fine surface cracks are called crazing. A hole that looked fine at installation is still under stress, and a few later conditions can be enough to turn that into visible damage.
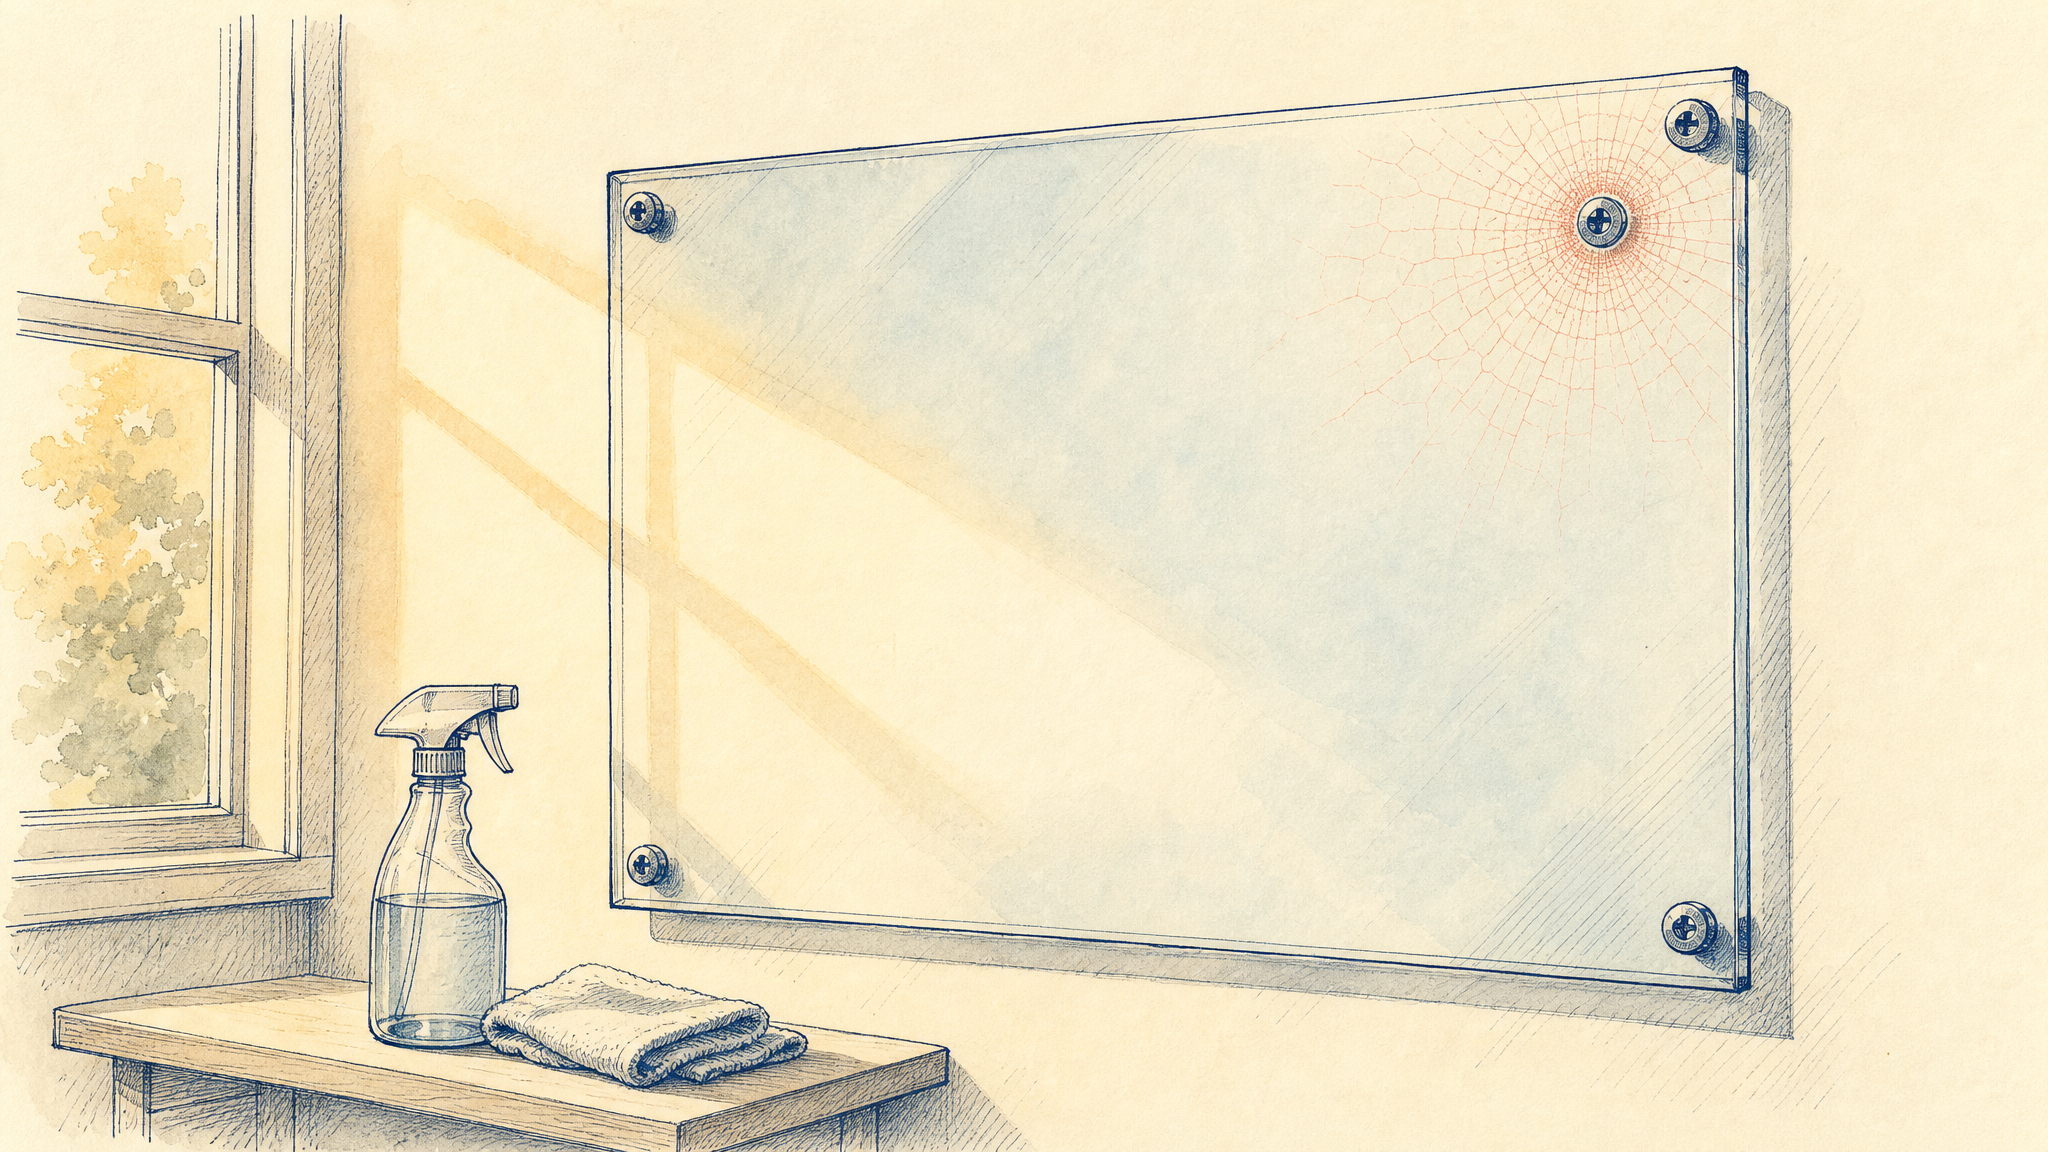
The panel warms and has nowhere to go. Perspex quotes a coefficient of thermal expansion of about 7 × 10⁻⁵ per kelvin.[3] Applied to a one-metre panel, a 30 °C temperature swing works out at roughly 2 mm of movement. If tight fasteners hold both ends, that movement becomes stress concentrated at the holes. How acrylic expands with heat explains the calculation and why restrained expansion bows or damages a panel.
Something chemical reaches the stressed area. Acrylic can craze, crack or discolour on contact with incompatible materials, including some cleaners, polishes, adhesives, sealants, gaskets and cutting emulsions.[1] Perspex lists examples that have caused crazing, such as silicone sealants containing acetic acid, plasticised PVC profiles and peroxide-cured EPDM rubber. A screw hole is where both factors meet: the material is already stressed, and cleaning fluid, sealant or a rubber washer sits right against it. A gasket or washer that is meant to protect the hole needs to be compatible with acrylic.
Sheet type matters in aggressive conditions. Perspex recommends cast acrylic over standard extruded sheet where higher resistance to environmental crazing is needed, including high-temperature, polluted or chemically aggressive locations, and notes that extruded sheet in a stressed state can craze when exposed to chlorine from a pool. This does not mean extruded acrylic cannot be drilled or screwed. It means that when a fixed panel also faces heat or chemicals, the sheet type becomes part of the fastening decision. Cast vs extruded acrylic sheets covers the wider differences.
A crack’s appearance can point to its likely cause, although it cannot confirm one on its own:
A single crack running from the hole towards the edge
A notch at the hole, a hole too close to the edge, or a panel restrained from moving
Fine crazing in a ring around the hole
Stress from clamping combined with an incompatible cleaner, sealant or washer
A hole that looks melted or gummy
Heat during drilling
Cracking that appears only after hot weather
Expansion with no clearance in the holes or frame
Fastening Acrylic Without a Screw Through It
Sometimes the better answer is to avoid a loaded hole altogether.
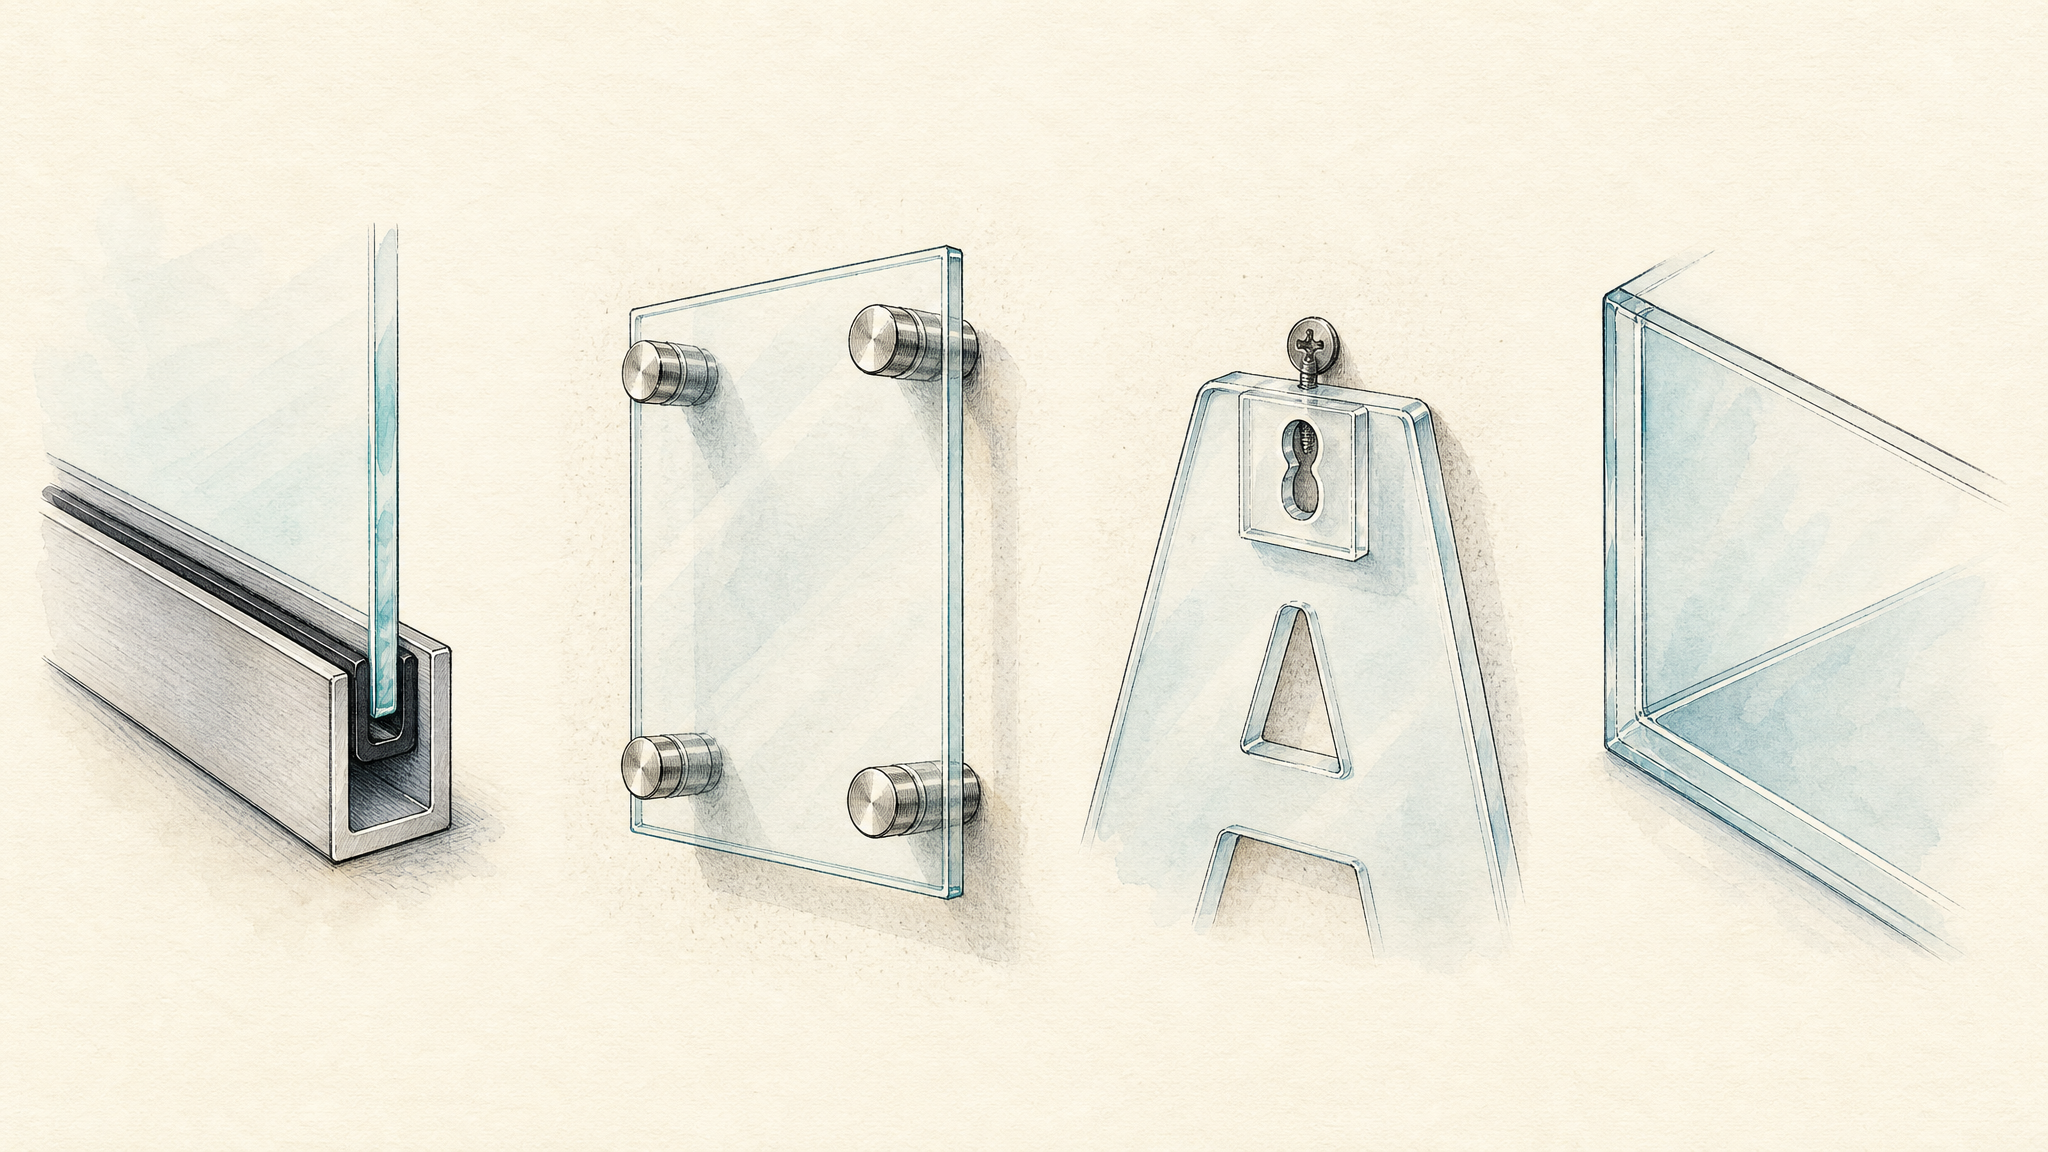
- Framing. A channel frame with a flexible gasket holds the sheet by its edges and takes up expansion, which is why it is common for larger and heavier panels. There is no hole for a crack to start from.
- Standoffs. These are common for signs and wall panels. They still need holes, so the clearance and edge-distance rules above still apply.
- Keyhole slots. For lightweight components such as flat-backed letters, a block with a routed keyhole slot is cemented to the back of the part so it can slide onto a screw fixed to the wall.[3] The visible face is never drilled.
- Bonding. Acrylic can be cemented to acrylic, so many display, enclosure and furniture assemblies use bonded joints instead of mechanical fasteners. A fixture can even be bonded to the back of a panel instead of passing through it. Joint design and adhesive choice then take over from hole design. See acrylic bonding and splicing for how bonded assemblies are made.
What the Screw Hole Says About Acrylic
Seen from the screw hole, acrylic’s properties line up in a useful way. Each one that makes fastening harder is linked to something the material does well.
| Property | At the screw | Why it suits certain products | What the design allows for |
|---|---|---|---|
| Stiff and hard rather than soft and yielding | The hole has little room to give | Flat, rigid, clear panels that hold their shape | Clearance holes and load spreading instead of a tight grip |
| Notch-sensitive | Chips, rough holes and sharp threads become crack starters | Cuts, machines and polishes to clean, precise edges, which is why it suits visible parts | Smooth, deburred or polished holes and rounded threads |
| High thermal expansion, low thermal conductivity | Drilling heat stays local; panels move with temperature | Shapes well under controlled heat for bending and forming | Room for movement in holes and frames |
| Sensitive to some chemicals under stress | Clamped holes are where crazing starts | Bonds well to itself with suitable cements | Compatible cleaners, sealants and gaskets |
| Easy to machine precisely | Threads and holes can be cut accurately | Drawing-based parts with tight, repeatable features | Metal inserts where threads must hold load or be reused |
Scroll the table sideways on a small screen.
This explains where acrylic works well. Machine guards and equipment covers use its clarity and rigidity, with clearance and metal hardware at the fixings, as covered in acrylic machine guards and equipment covers. Displays and fixtures often rely on bonding and slots, so the visible faces stay clean. Wall panels and signs can use framing, standoffs or slotted holes so expansion has somewhere to go. Electronics and device panels may need small threaded features, and that is where inserts earn their place.
Thin acrylic sheets add one more condition: less material around a hole leaves less margin, which makes hole position and support even more important.
Test the Assembly, Not Just the Sheet
A drilled sample proves very little on its own. The useful test is the finished assembly: the actual sheet and thickness, the real fasteners, washers and gaskets, tightened as they will be in service, then left in place. Where the part will see heat, sunlight, or regular cleaning, include those conditions and the actual cleaner before judging the result. Cracks that appear later in service start in that combination, not on a bare offcut.
If you are planning acrylic parts with holes or fixings, send the drawing to Grandview Acrylic with each hole marked as clearance, threaded, or insert, and a note on how the part is mounted. The holes can then be reviewed and cut as part of CNC machining, with the outline and the fixings planned together.
References
- ACRYLITE — Drilling ACRYLITE® Acrylic Sheet (Fabrication Manual). Drill geometry for scraping rather than gouging; low thermal conductivity and high thermal expansion; point-fastening rules for hole diameter and edge distance; deburring; contact with incompatible materials. View source
- ACRYLITE — Machining ACRYLITE® Acrylic Sheet (Fabrication Manual). Thread cutting, notch sensitivity, non-load-bearing threads and metal inserts. View source
- Perspex® — Acrylic Sheet Glazing Manual (PDF). Notch sensitivity at holes; oversize, elongated and polished holes; washers and grommets; no countersunk screws; framing and keyhole slotting; thermal expansion; materials known to cause crazing; cast versus extruded craze resistance. View source